
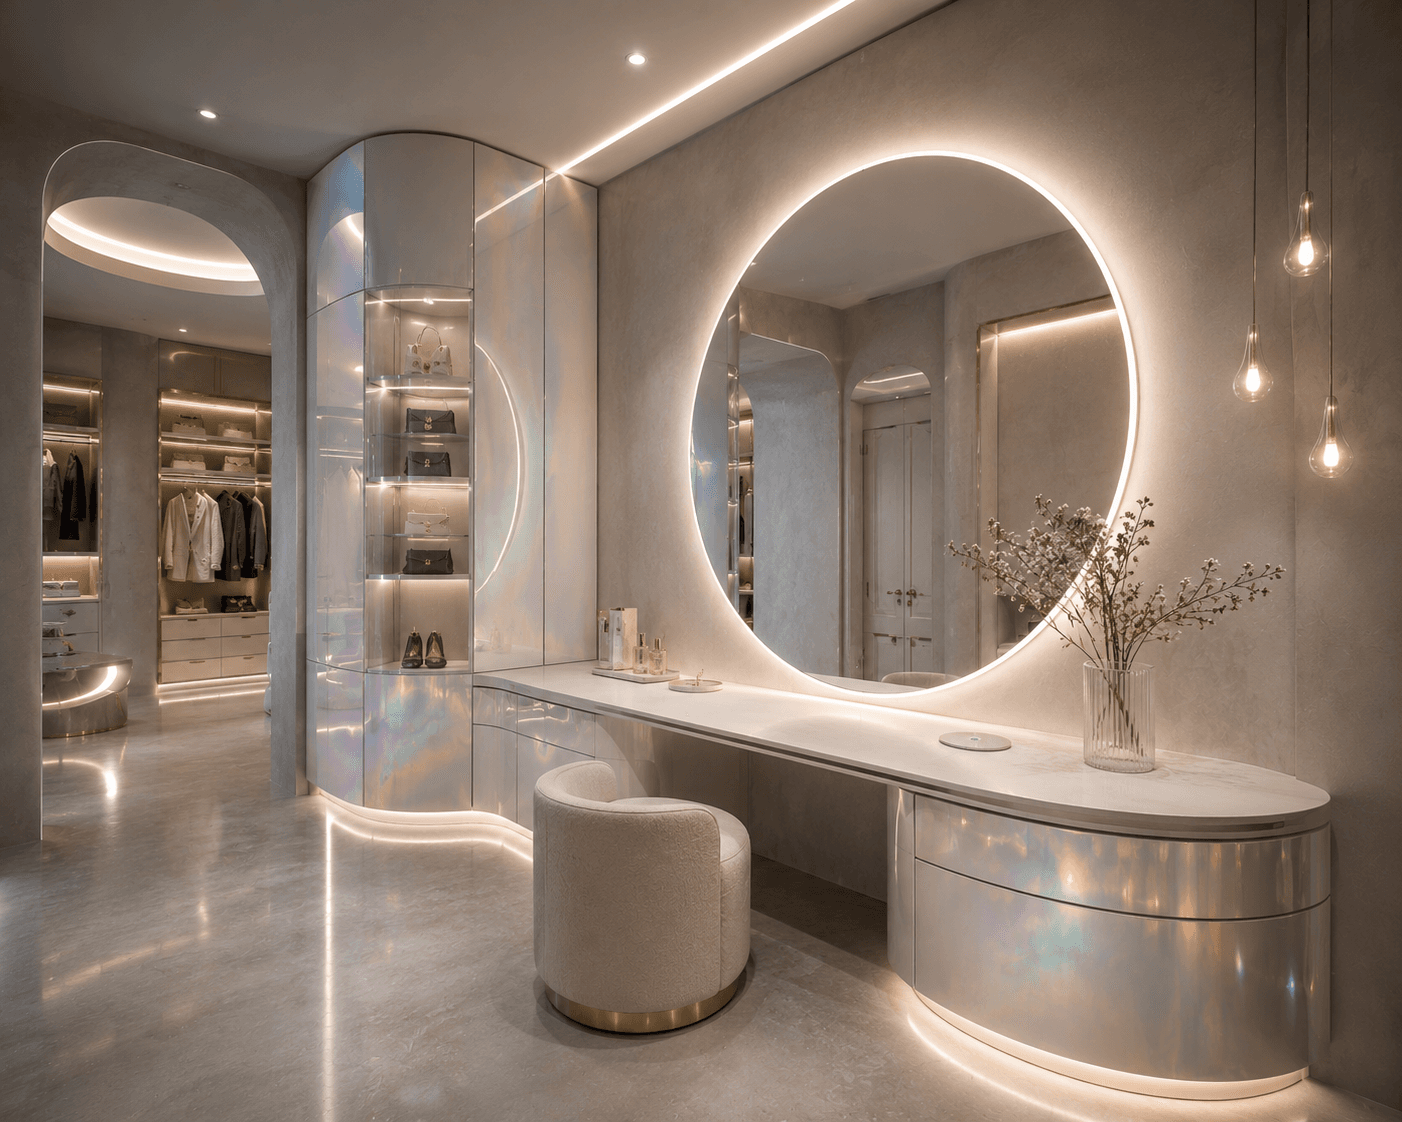
A dressing suite in soft matt greys where every light source hides — ceiling coves, toe-kicks, shelf halos, a moon-sized mirror ring — and the only pattern is an iridescent mother-of-pearl finish flowing across curved, floating cabinetry.
The idea behind it
The room's luxury is luminosity, not ornament. Limewashed plaster walls stay bare; instead, light traces every edge — the arch, the mirror, the floating cabinet bases — so the architecture itself glows. Dimmed low, the suite becomes a nightscape of soft rings and lines.
Iridescence is deployed like a precious material: only the curved cabinet volumes wear the pearl finish, shifting lilac-gold-aqua as you move. Against nine parts matt grey, that one shimmering surface reads as jewellery rather than gimmick.
Geometry is consistently soft — oval counter, bowed tower, arched portal, cylindrical stool, teardrop pendants. Repeating the curve at every scale is what gives the space its seamless, poured-from-one-piece calm.
What you will need
Halo-lit round mirror, A 90–120 cm backlit ring mirror as the room's central glow.
Iridescent cabinet fronts, Dichroic film or pearl lacquer on smooth curved drawer and door faces.
Curved floating counter, A cantilevered oval-edged vanity top with hidden bracket support.
LED cove and toe-kick strips, Warm-white hidden strips at ceiling, floor and shelf level, all dimmable.
Teardrop glass pendants, A cluster of drop-shaped pendants hung at varying heights beside the mirror.
Boucle drum stool, A round upholstered stool with a brass base ring.
Limewash or matt plaster paint, Soft cloudy grey walls that diffuse the glow.
Glass display shelving, Lit curved-front shelves for a few displayed accessories.
Steal the look
Step 1
Paint or limewash the room in a single soft grey with a completely matt finish — this is the screen the light plays on.
Step 2
Plan lighting zones first: ceiling cove, mirror halo, shelf strips, toe-kick — each on its own dimmer channel.
Step 3
Mount the halo mirror with its centre at about 120 cm, leaving clear wall around it for the glow to bloom.
Step 4
Install the curved counter on concealed brackets at 73–75 cm, with a gentle oval overhang at the seat.
Step 5
Apply iridescent film or lacquer to cabinet fronts — curved surfaces show the colour shift best.
Step 6
Fit toe-kick LEDs so all cabinetry appears to float; use aluminium diffuser channel to avoid dotting.
Step 7
Hang teardrop pendants in a loose cluster at one side, their lowest drop around shoulder height when seated.
Step 8
Style with almost nothing: one vase of wildflower stems, a perfume tray, and empty glowing space.
Perfect for
- Minimalists who still want one wow surface
- Evening-routine lovers — the dimmed nightscape is the best version
- New builds and renovations where wiring is accessible
- Anyone drawn to spa-like, decompression-chamber calm
Avoid if
- You love colour, pattern and collected objects on show
- Rewiring or hard-wired strips aren't possible
- Curved bespoke joinery is outside the budget and you'd compromise on square boxes
- The room doubles as a bright daytime workspace
Estimated budget
Budget
Ready-made halo mirror, plug-in LED strip kits, iridescent film on flat-pack cabinets and a high-street boucle stool.
$400-$1,200
Mid-range
Curved-front semi-custom cabinetry, pearl lacquer finish, hard-wired dimmer zones and quality glass pendants.
$1,200-$4,500
Luxury
Fully bespoke curved joinery, sprayed pearl finishes, integrated cove architecture and scene-programmed lighting throughout.
$4,500+
Colour palette5 tones
Cloud Grey
walls and floor
#C9C7C4
Pearl Shimmer
iridescent cabinetry
#E6D9E8
Warm Halo
LED lighting
#FFEFD6
Oyster White
counter and stool
#EFEAE2
Soft Gold
stool base and accents
#CBB98E
Frequently AskedQuestions
Two main routes: dichroic or pearlescent adhesive film applied to smooth (ideally curved) fronts, or a sprayed pearl lacquer over a pale base coat. Film is renter-friendly and reversible; lacquer is more durable and seamless. Keep surrounding surfaces matt and neutral so the shimmer stays sophisticated.
Go bigger than instinct says — 90 to 120 cm diameter for a feature wall. The halo needs 5–10 cm of clear wall around it to bloom, and the centre should sit at seated eye height, roughly 115–125 cm from the floor.
Toe-kick and shelf strips are easy DIY with plug-in kits and aluminium diffuser channels. Ceiling coves need a routed recess or surface-mounted pelmet and ideally an electrician for hard-wiring and dimmer zoning, but none of it requires structural work.
Join the conversation
Share your thoughts on this room.